Without further ado, following are the steps to construct your own lab with a 2 node 12c RAC on Linux 6 using Oracle Virtual Box.
You can download the required software from below links:-
To give you an overview, this is what we are going to do:-
- Install Oracle VirtualBox to create our 2 nodes.
- Create node1 with following configuration:-
- Hostname – ora12node1
- IP:-
- Public – 10.0.0.121 (ora12node1)
- Private – 192.168.0.121 (ora12node1-priv)
- VIP – 10.0.0.123 (ora12node1-vip)
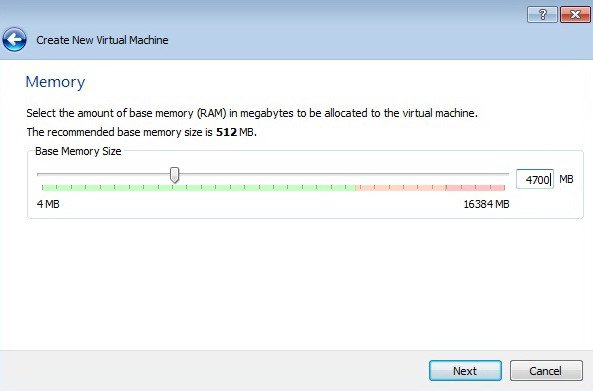
- 4700 MB RAM
- 30GB Storage
- Clone this VM to build our node2 and then edit settings to reflect as:-
- Hostname – ora12node2
- IP:-
- Public – 10.0.0.122 (ora12node2)
- Private – 192.168.0.122 (ora12node2-priv)
- VIP – 10.0.0.124 (ora12node2-vip)
- Create Shared Disks to serve as our shared storage.
- Configure ASM and create ASM disks.
- Install GRID.
- SCAN – 10.0.0.125 (ora12c-scan)
- Install DB
- Create single-tenant database (CDB with one PDB).
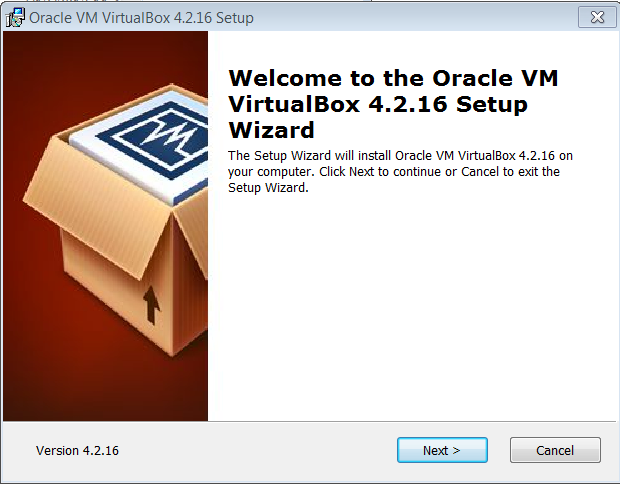
STEP 1 – Oracle VirtualBox Installation.
Run the setup from the downloaded Oracle VirtualBox software, this would present you with setup dialog box as below. Proceed with the setup to perform a clean installation.
STEP 2 – Create Virtual Machine
- Once VirtualBox is installed, open the VirtualBox Manager to create a new machine by clicking at New tab, this will open following dialog box.
- Enter the desired VM’s Name and Choose the OS as per the software handy with you.

- Memory Settings – Choose appropriate memory setting, as per the available RAM on your host machine.
- Virtual Hard Disk – At this stage choose the default i.e. Create new hard disk.

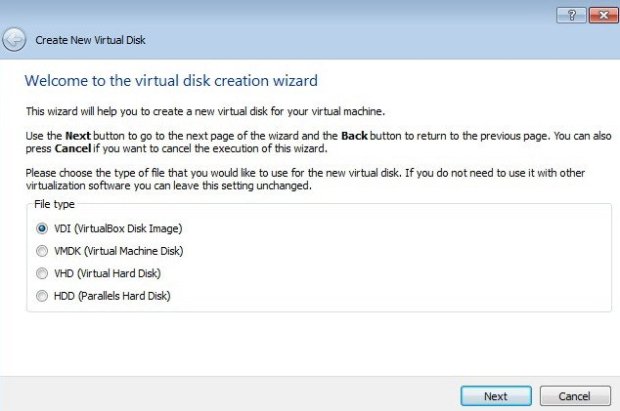
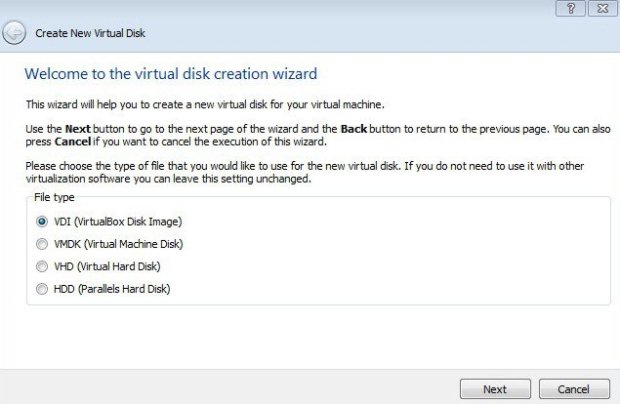
- Choose the File Type for Virtual Disk
- Depending on your need choose the File type accordingly, if not sure, choose the default i.e. VDI
- Virtual Disk Storage Details – If this is a test env. choose Dynamically Allocated else for better performance choose Fixed Size.

- Virtual Disk File Location – Choose the appropriate path at the Host machine where you want to create the physical file for Virtual Disk and also specify the Size.

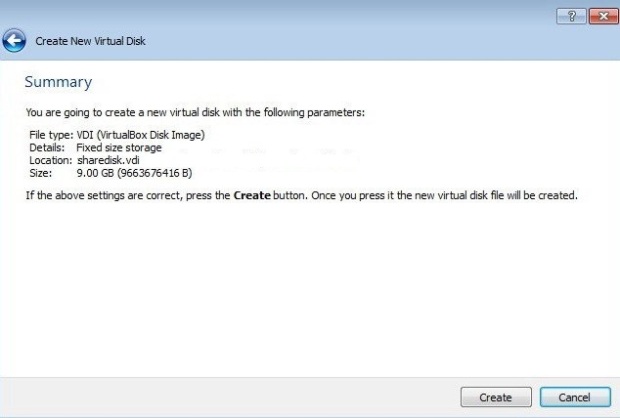
- Review the information in the Summary and Click on Create tab to create the Virtual Disk with specified configuration.

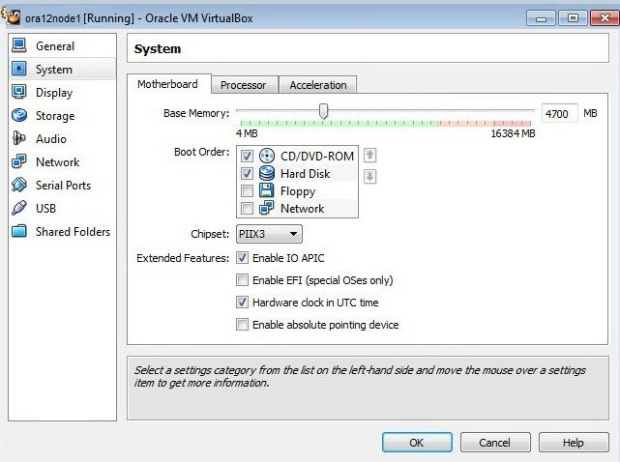
- VM – System Settings – Choose the appropriate system settings (RAM, Processor, etc) as per your requirement
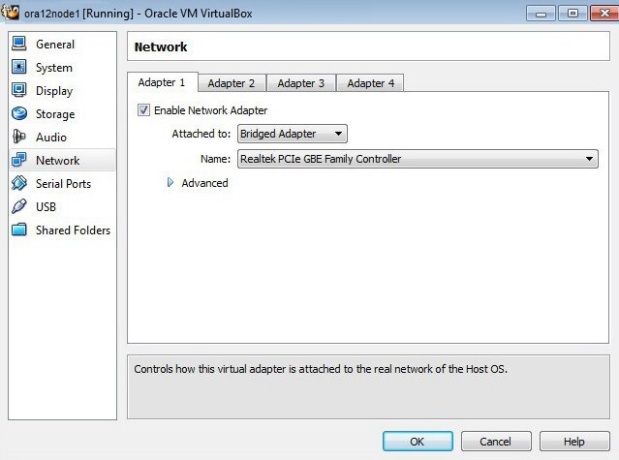
- VM – Network Settings – Adapter 1
- Choose the Network Adapter for your env. Since we need 2 Network Adapter for Public and Private Communication, we would enable 2 Network Adapter.
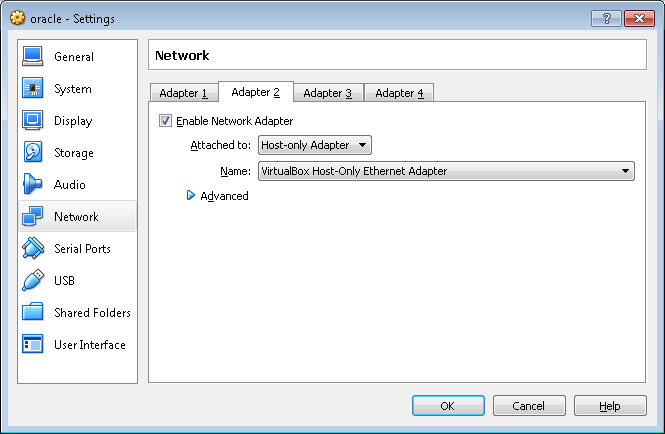
- Choose the appropriate Adapter for your env., here I would be choosing Bridged for Adapter1 (Public IP) & Host-only Adapter for Adapter 2 (Private IP)
- VM – Network Settings – Adapter 2
- Choose the network configuration for 2nd Adapter and then close the settings dialog box.
STEP 3 – Start the VM
- Right click on the VM and choose Start => Normal Start
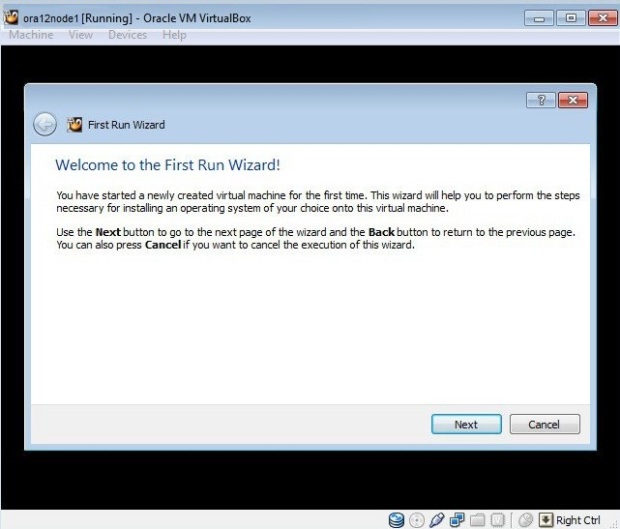
- Installation Media – During Start the VM would prompt for installation media, choose the ISO of the OS you have selected during STEP – 2 and click Next.

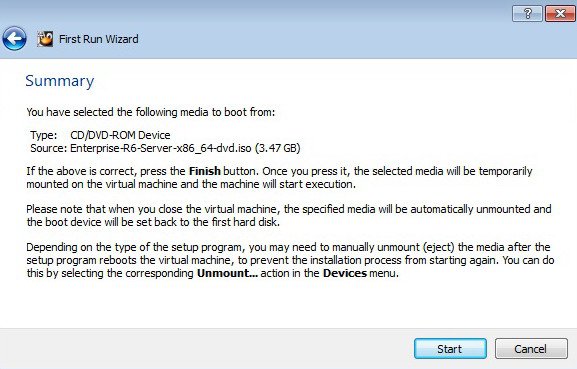
- Review the Summary tab and click Start.
STEP 4 – OS Installation
- Once the VM is booted with provided ISO, choose the Install or upgrade an existing system tab and hit Enter.

- Press tab to move focus to the “Skip” key, then press Enter.

- Click Next

- Choose Language and click Next.

- Choose Keyboard setting and click Next.

- Choose the appropriate Storage Option and click Next.

- If this warning is prompted, Choose Yes, discard any data to format the partition.
- In case any error regarding initialize is prompted choose Re-initialize all and proceed.

- Enter the desired hostname for this VM. Here we are choosing ora12node1.
And then Choose the Configure Network tab.

- Choose System eth0 and Click Edit, in the Network Connections tab.

- In Editing System eth0 dialog box, tick on Connect Automatically and Available to all users check boxes.
- Then click the IPv4 Settings tab.

- In the IPv4 Settings tab, ensure the Method is Manual (Since we are not using DHCP) and Add the Network Address, Netmask and Gateway accordingly.
- Once through Click Apply.

- Now proceed similarly for System eth1.

- Edit System eth1

- Enter the IPv4 Settings.

- Once through with both the Network Connections close the dialog box and click Next.

- Choose the relevant timezone and click Next.

- Enter the credentials for root user and click Next.

- Choose the appropriate partitioning type, if you want to review and modify the partitioning, tick the checkbox Review and modify partitioning layout.

- Choose Write changes to disk.

- Click on Customize Now tick box and Click Next.
We want to choose following packages for our installation:-
- Base System > Base
- Base System > Compatibility libraries
- Base System > Hardware monitoring utilities
- Base System > Large Systems Performance
- Base System > Network file system client
- Base System > Performance Tools
- Base System > Perl Support
- Servers > Server Platform
- Servers > System administration tools
- Desktops > Desktop
- Desktops > Desktop Platform
- Desktops > Fonts
- Desktops > General Purpose Desktop
- Desktops > Graphical Administration Tools
- Desktops > Input Methods
- Desktops > X Window System
- Applications > Internet Browser
- Development > Additional Development
- Development > Development Tools

- Choose the appropriate base packages, in case you need to install additional packages Click on the Optional packages tab.

- In the Optional Packages dialog box, Choose the appropriate rpms.


Ensure all the packages mentioned below are chosen.
- Base System > Base
- Base System > Compatibility libraries
- Base System > Hardware monitoring utilities
- Base System > Large Systems Performance
- Base System > Network file system client
- Base System > Performance Tools
- Base System > Perl Support
- Servers > Server Platform
- Servers > System administration tools
- Desktops > Desktop
- Desktops > Desktop Platform
- Desktops > Fonts
- Desktops > General Purpose Desktop
- Desktops > Graphical Administration Tools
- Desktops > Input Methods
- Desktops > X Window System
- Applications > Internet Browser
- Development > Additional Development
- Development > Development Tools

- Wait for the installation to complete. If this asks for reboot please reboot the system.

- Click Forward tab on the Welcome Screen.

- Accept the agreement and click Forward.

- Choose the appropriate option and click forward.


- We would create the user afterwards so click Forward.

- Adjust the Date and Time and Click Forward.

- Accept the default settings and click Finish.

- Login with the root creds to login to the machine.

STEP 5 – Oracle Installation (Automatic Setup)
Oracle provides rpm for automatic setup for the installation, download and install the rpm via yum.
yum install oracle-rdbms-server-12cR1-preinstall -y
STEP 6 – Oracle Installation (Manual Setup)
In case you do not wish to use automatic installation please follow below steps for manually configuring the env. for oracle 12c installation. Even if you go for automatic setup please ensure below settings to avoid any gaps in following this Article further.
- Add or Amend following lines to “/etc/sysctl.conf”.
fs.file-max = 6815744
kernel.sem = 250 32000 100 128
kernel.shmmni = 4096
kernel.shmall = 1073741824
kernel.shmmax = 4398046511104
net.core.rmem_default = 262144
net.core.rmem_max = 4194304
net.core.wmem_default = 262144
net.core.wmem_max = 1048576
fs.aio-max-nr = 1048576
net.ipv4.ip_local_port_range = 9000 65500
- Run following command to make these changes in effect.
/sbin/sysctl -p
- Add the following lines to the “/etc/security/limits.conf” file.
oracle   soft   nofile    1024
oracle   hard   nofile    65536
oracle   soft   nproc    2047
oracle   hard   nproc    16384
oracle   soft   stack    10240
oracle   hard   stack    32768
- Install following packages recommended for Oracle 12c installation.
yum install binutils -y
yum install compat-libcap1 -y
yum install compat-libstdc++-33 -y
yum install compat-libstdc++-33.i686 -y
yum install gcc -y
yum install gcc-c++ -y
yum install glibc -y
yum install glibc.i686 -y
yum install glibc-devel -y
yum install glibc-devel.i686 -y
yum install ksh -y
yum install libgcc -y
yum install libgcc.i686 -y
yum install libstdc++ -y
yum install libstdc++.i686 -y
yum install libstdc++-devel -y
yum install libstdc++-devel.i686 -y
yum install libaio -y
yum install libaio.i686 -y
yum install libaio-devel -y
yum install libaio-devel.i686 -y
yum install libXext -y
yum install libXext.i686 -y
yum install libXtst -y
yum install libXtst.i686 -y
yum install libX11 -y
yum install libX11.i686 -y
yum install libXau -y
yum install libXau.i686 -y
yum install libxcb -y
yum install libxcb.i686 -y
yum install libXi -y
yum install libXi.i686 -y
yum install make -y
yum install sysstat -y
yum install unixODBC -y
yum install unixODBC-devel -y
- Create required Users, Groups and directories.
groupadd -g 1000 oinstall
groupadd -g 1010 dba
groupadd -g 1020 asmadmin
groupadd -g 1030 asmdba
useradd -u 1101 -g oinstall -G dba,asmdba oracle
chmod -R 775 /u01
passwd oracle
useradd -u 1100 -g oinstall -G asmadmin,asmdba grid
chown -R grid:oinstall /u01
passwd grid
STEP 7 – Oracle Installation (Additional Setup)
- Regardless of Automatic or Manual setup following steps needs to be performed.
- Create Directory Structure as below
mkdir -p /u01/app/12.1.0/grid  ####{grid-home}
mkdir -p /u01/app/grid  ######{grid-base}
mkdir -p /u01/app/oracle/product/12.1.0  ######(oracle home)
chown -R  oracle:oinstall /u01/app/
- Set Bash Profile for both Grid & Oracle User.
#Grid user
export ORACLE_HOME=/u01/app/12.1.0/grid
export ORACLE_SID=+ASM1
export PATH=$ORACLE_HOME/bin:$PATH
export ORACLE_BASE=/u01/app/grid
export LD_LIBRARY_PATH=$ORACLE_HOME/lib:/lib:/usr/lib
export CLASSPATH=$ORACLE_HOME/JRE:$ORACLE_HOME/jlib:$ORACLE_HOME/rdbms/jlib
export ORACLE_HOME=/u01/app/oracle/product/12.1.0
export ORACLE_SID=vstracdb1
export PATH=$ORACLE_HOME/bin:$PATH
export ORACLE_BASE=/u01/app/oracle
export LD_LIBRARY_PATH=$ORACLE_HOME/lib:/lib:/usr/lib
export CLASSPATH=$ORACLE_HOME/JRE:$ORACLE_HOME/jlib:$ORACLE_HOME/rdbms/jlib
PS:- You might have to change the Oracle SID once the machine is cloned for secondary node, +ASM2
- Edit “/etc/hosts” as below:-
cat /etc/hosts
127.0.0.1 localhost localhost.localdomain localhost4 localhost4.localdomain4
::1 localhost localhost.localdomain localhost6 localhost6.localdomain6
###########Public ips############################################
10.0.0.121  ora12node1.localdomain.com     ora12node1
10.0.0.122  ora12node2.localdomain.com    ora12node2
###########Private ips############################################
192.168.0.121 ora12node1-priv.localdomain.com    ora12node1-priv
192.168.0.122 ora12node2-priv.localdomain.com    ora12node2-priv
###########Virtual ips############################################
10.0.0.123 ora12node1-vip.localdomain.com ora12node1-vip
10.0.0.124 ora12node2-vip.localdomain.com ora12node2-vip
###########scan ips############################################
10.0.0.125 ora12c-scan.localdomain.com ora12c-scan
- Disable firewall
service iptables stop
chkconfig iptables off
- Disable SELINUX
Edit the /etc/selinux/config file as:-
SELINUX=permissive
And then run the following command:-
setenforce Permissive
- Disable NTP
service ntpd stop
chkconfig ntpd off
mv /etc/ntp.conf /etc/ntp.conf.orig.bkp
rm -rf /var/run/ntpd.pid
- Amend the “/etc/security/limits.d/90-nproc.conf” file as below
*          -       nproc     16384
root       soft    nproc     unlimited
- Install Guest Additions
Guest Additions are required to set up shared folder between Host machine and Guest machine which we would require to transfer files/folders to guest VM.
On the Linux desktop click on the “Devices > Install Guest Additions” menu option at the top of the VM screen. Or alternatively:-
cd /media/VBOXADDITIONS_4.2.10_9972
sh ./VBoxLinuxAdditions.run
And then :-
usermod -G vboxsf,dba oracle
- Create Shared Folder
Create a shared folder (Devices > Shared Folders) on the virtual machine, pointing to the directory on the host where the softwares are located and name the Folder Name as “share”. Check the “Auto-mount” and “Make Permanent” options before clicking the “OK” button.
mkdir /share
mount -t vboxsf share /share/
You should now be able to access the share folder between Host and Guest machines.
STEP 8 – Clone the VM
- Shutdown the VM.
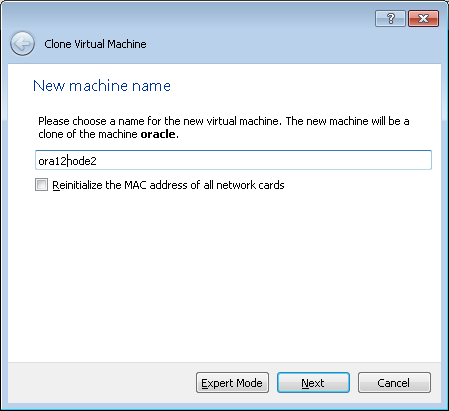
- Right click the machine and Click on Clone, this would open a “Clone Virtual Machine” wizard.
- Enter the name of the machine in the Wizard and click Next.
- Choose Full Clone and Click Clone tab.

- Then Start the VM.
- Change hostname by editing file “/etc/sysconfig/network”, HOSTNAME parameter:
HOSTNAME=ora12node2.localdomain.com
- Shutdown the VM
- Then Change the Network Configuration, in VM Settings as we did during STEP 24 to change the Public and Private IP.
- Start both the VMs and check if we can PING the Public and Private IP from both the nodes.
STEP 9 – Create Shared Disks
Now to create the shared disks for our shared storage..
- Shut down the 1st VM (ora12node1).
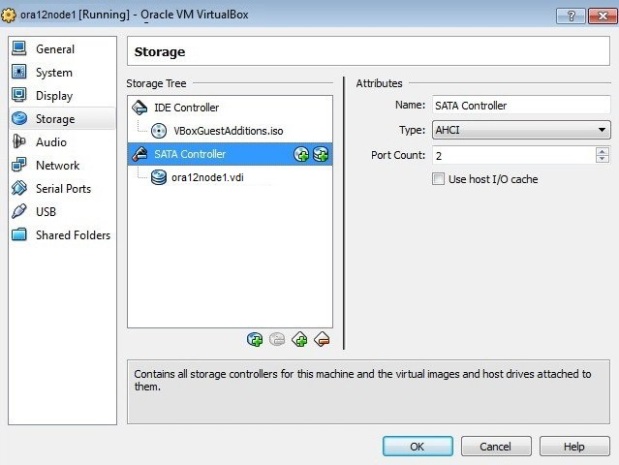
- Got to VM settings.
- Storage
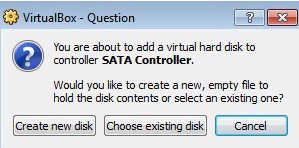
- Click the green plus icon to add a Hard Disk.
- Choose create new disk.
- Choose appropriate file type (default VDI).
- Choose Fixed Size.

- Cross-check the settings in the summary tab and click Create.
- To make this disk shareable:-
- Go to File => Virtual Media Manager.
- Select the newly created disk and click on Modify tab.
- Choose the Shareable mode and then Click OK.
- Now Start the 2nd VM (ora12node2) and proceed as below:-
- Follow above steps for node 2.
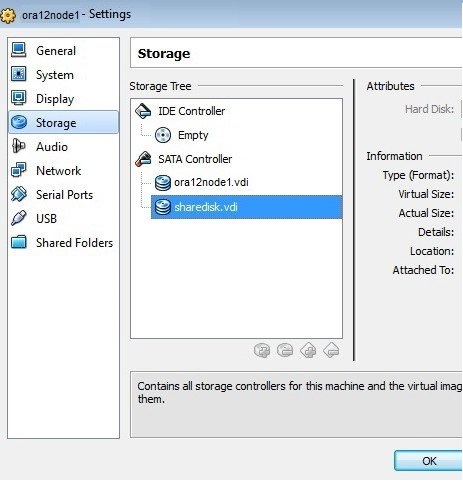
- Now in next Step, choose “Choose existing disk” tab.
- Browse to the location of the newly created disk in Step – 56 and select the shared disk.
- Press OK and you should have your shared disks visible to both the nodes.
STEP 10 – Configure ASM
- a) Login as root on node1.
- b) And then execute following command to configure asm:-
[root@ora12node1 ~]# oracleasm configure -i
Configuring the Oracle ASM library driver.
This will configure the on-boot properties of the Oracle ASM library
driver.  The following questions will determine whether the driver is
loaded on boot and what permissions it will have.  The current values
will be shown in brackets ('[]').  Hitting <ENTER> without typing an
answer will keep that current value.  Ctrl-C will abort.

Default user to own the driver interface []: grid
Default group to own the driver interface []: asmadmin

Start Oracle ASM library driver on boot (y/n) [n]: y
Scan for Oracle ASM disks on boot (y/n) [y]:

Writing Oracle ASM library driver configuration: done
- c) Run following command to initialize the asm
[root@ora12node1 ~]# oracleasm init
Creating /dev/oracleasm mount point: /dev/oracleasm
Loading module "oracleasm": oracleasm
Configuring "oracleasm" to use device physical block size
Mounting ASMlib driver filesystem: /dev/oracleasm
- d) Verify the shared disk /dev/sdb exist on both nodes using below command:-
[root@ora12node1 ~]# fdisk -l /dev/sdb
Disk /dev/sdb: 4260 MB, 4260364288 bytes
255 heads, 63 sectors/track, 517 cylinders
Units = cylinders of 16065 * 512 = 8225280 bytes
Sector size (logical/physical): 512 bytes / 512 bytes
I/O size (minimum/optimal): 512 bytes / 512 bytes
Disk identifier: 0x00000000
- Repeat a), b), c) & d) on node2.
- On node1 (ora12node1) execute the following command to create partition:-
[root@ora12node1 ~]# fdisk /dev/sdb
Device contains neither a valid DOS partition table, nor Sun, SGI or OSF disklabel
Building a new DOS disklabel with disk identifier 0xd763cd1b.
Changes will remain in memory only, until you decide to write them.
After that, of course, the previous content won't be recoverable.
Warning: invalid flag 0x0000 of partition table 4 will be corrected by w(rite)

Warning: DOS-compatible mode is deprecated. It's strongly recommended to
switch off the mode (command 'c') and change display units to
sectors (command 'u').
Command (m for help): n

Command action
e   extended
p   primary partition (1-4)
p
Partition number (1-4): 1
First cylinder (1-517, default 1):
Using default value 1
Last cylinder, +cylinders or +size{K,M,G} (1-517, default 517):
Using default value 517
Command (m for help): w

The partition table has been altered!

Calling ioctl() to re-read partition table.
Syncing disks.
PS: The sequence for creating above partition is “n”, “p”, “1”, “Return”, “Return” and “w”.
- Verify the new partition /dev/sdb1 on both the nodes using the below command:-
[root@ora12node1 ~]# fdisk -l /dev/sdb

Disk /dev/sdb: 9663 MB, 9663676416 bytes
255 heads, 63 sectors/track, 1174 cylinders
Units = cylinders of 16065 * 512 = 8225280 bytes
Sector size (logical/physical): 512 bytes / 512 bytes
I/O size (minimum/optimal): 512 bytes / 512 bytes
Disk identifier: 0x9590bc78
Device Boot      Start         End      Blocks   Id  System
/dev/sdb1               1        1174     9430123+  83  Linux
- Run oracleasm to createdisk on node1 (ora12node1)
[root@ora12node1 ~]# oracleasm createdisk disk1 /dev/sdb1
Writing disk header: done
Instantiating disk: done
[root@ol6-ora12node1 ~]# oracleasm scandisks
Reloading disk partitions: done
Cleaning any stale ASM disks...
Scanning system for ASM disks...
[root@ol6-ora12node1 ~]# oracleasm listdisks
disk1
- Check if this asm disk are visible to node2
[root@ol6-ora12node2 ~]# oracleasm listdisks
disk1
STEP 11 – Oracle Grid Infrastructure Installation.
- Navigate to the grid/rpm directory.
- Locate the cvqdisk* rpm.
- Install the cvqdisk* rpm as root user.
rpm -ivh cvuqdisk-1.0.9-1.rpm
- Now as grid user navigate to the grid directory on node1
- And then start the Oracle Installer.
./runInstaller
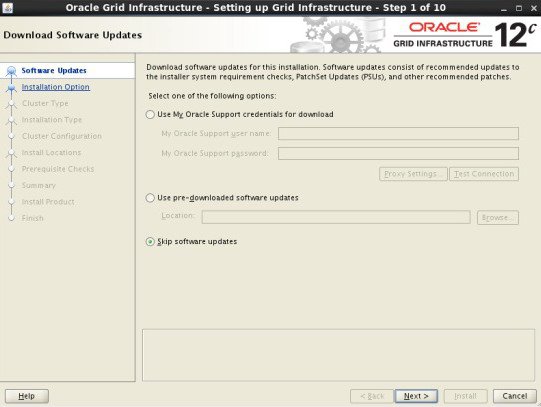
- This should present you with following screen. Choose the appropriate option and Click Next.
- In the next screen Choose “Install and Configure Oracle Grid Infrastructure for a Cluster” and click Next.

- In the next screen Choose “Configure a Standard cluster” and click Next.

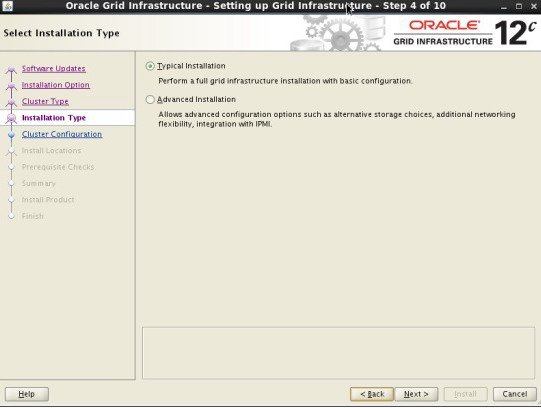
- Choose Typical Installation and click Next.
- Enter SCAN Name and Add your Cluster Nodes.

- Ensure both the nodes are added and then mention the Username as “grid” and specify the password for grid user.
- Then Click on SSH Connectivity if you haven’t configured passwordless connectivity or press Next.
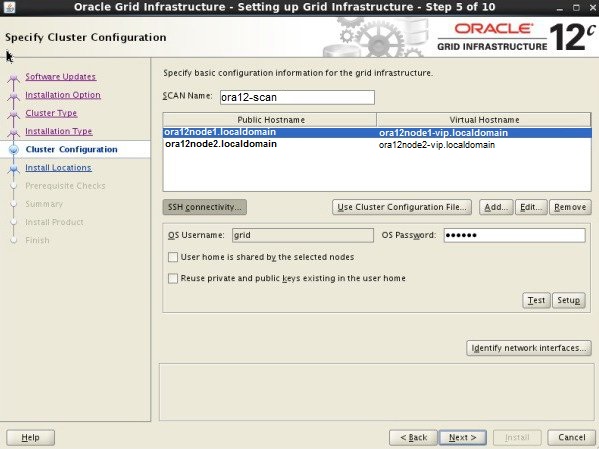
- Installer would then check passwordless connectivity between the nodes.

- In the next tab verify the network interfaces.
- If prompted specify the SCAN name of your cluster.

- Specify the SYSASM password.

- Provide ASM Disk Discovery Path.
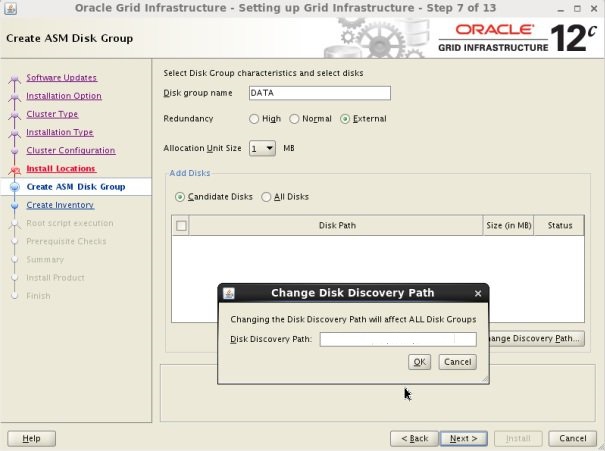
- View available disk and confirm.

- Confirm the inventory location.

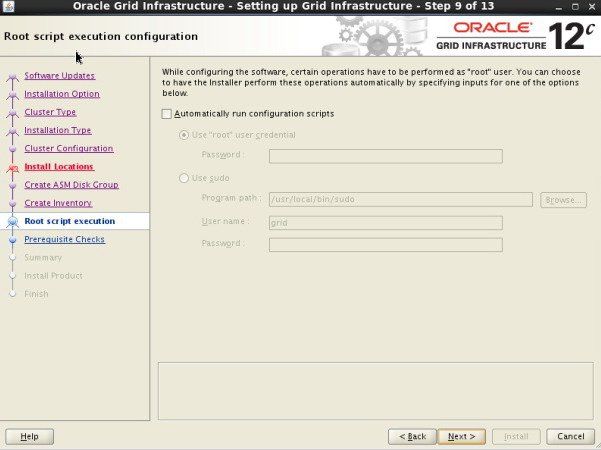
- Depending upon your env. specify root password or simply click “Next”.
- Now installer would check the pre-requisites before proceeding with the installation.
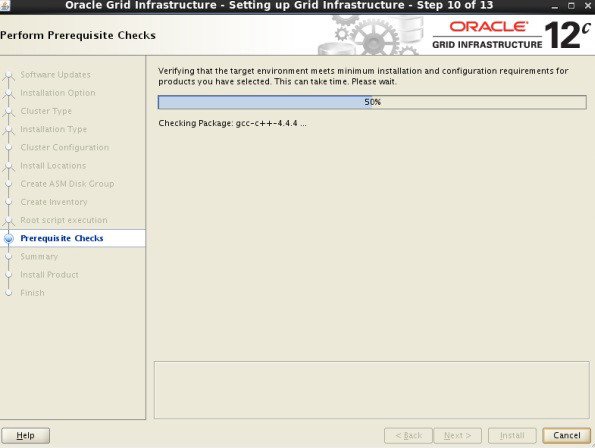
- Check if any pre-requisite check if failed and accordingly fix/ignore the error and click Next.
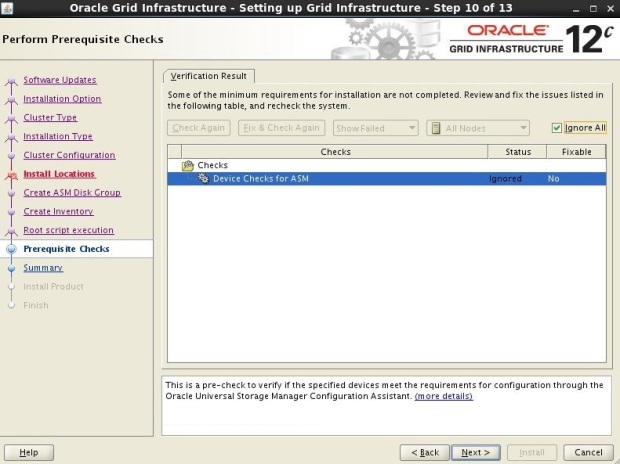
- If you ignore any error the installer would prompt you for confirmation, Click Yes and Proceed.

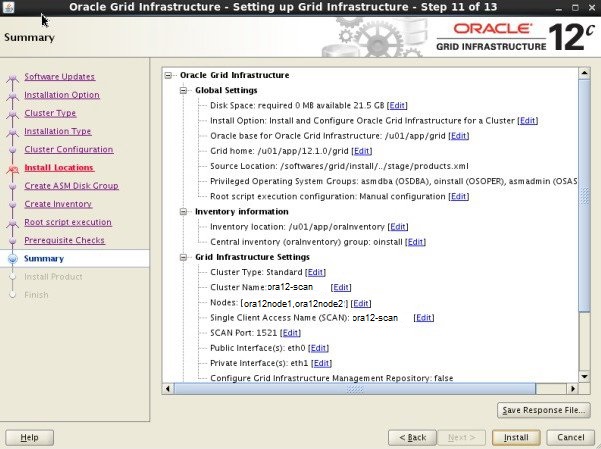
- Review the information in Summary Tab and Click Install to start the Grid Installation.
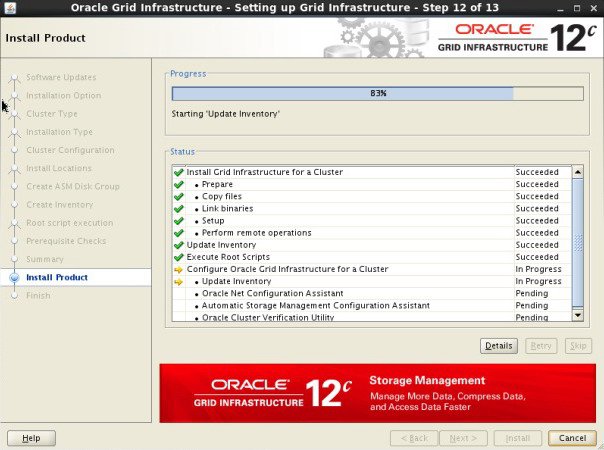
- Wait for the installation to Complete, review the logfile in case the progress seems stuck.

- When prompted, run the shell scripts on the nodes with root user in order on both nodes.
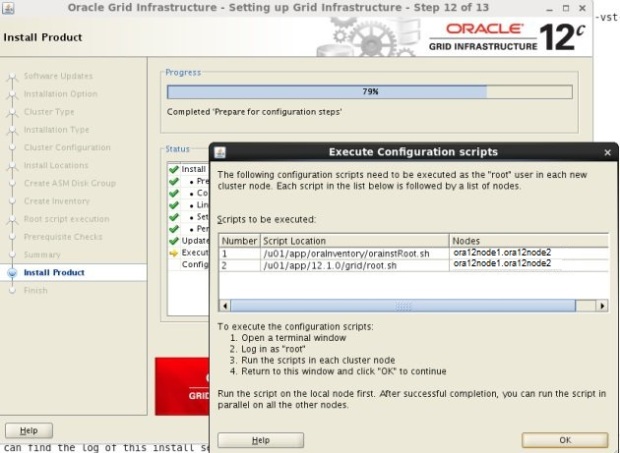
- Once both the scripts are executed on all the nodes, click OK and the installer would proceed further.
- Once the Grid Installation is complete, click Close.

- Check that the Grid software has been installed successfully.
- Run the following command on both nodes.
crsctl stat res -t
STEP 12 – Oracle 12cR1 database Installation.
- Go to the database software directory.
- Run the Oracle Universal Installer from database software directory.
./runInstaller
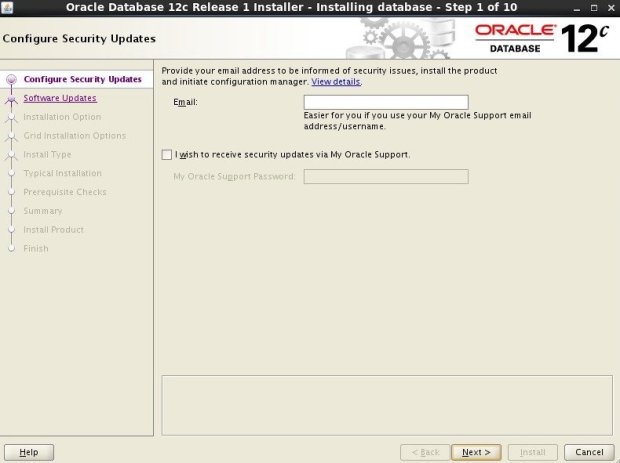
- Once the OUI wizard would open and you see the following welcome screen.
- Click Next.
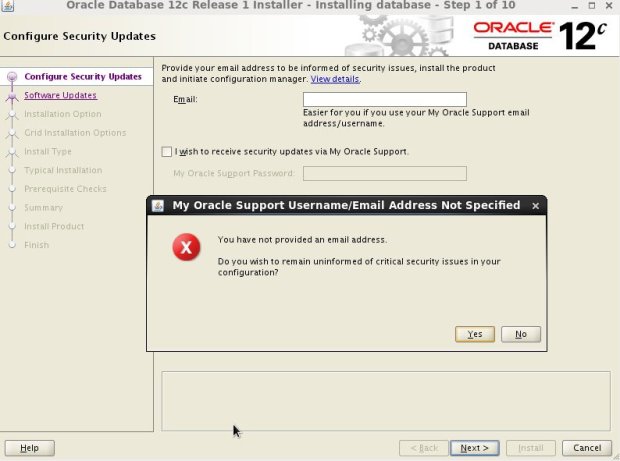
- Click Next and Yes.
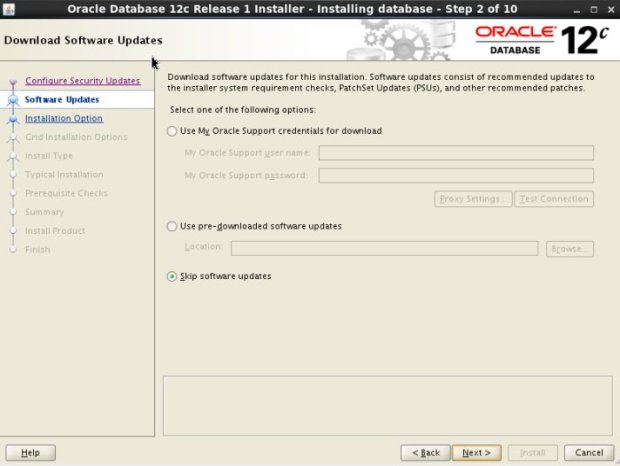
- Choose appropriate option, in this case we would choose Skip Software Updates.
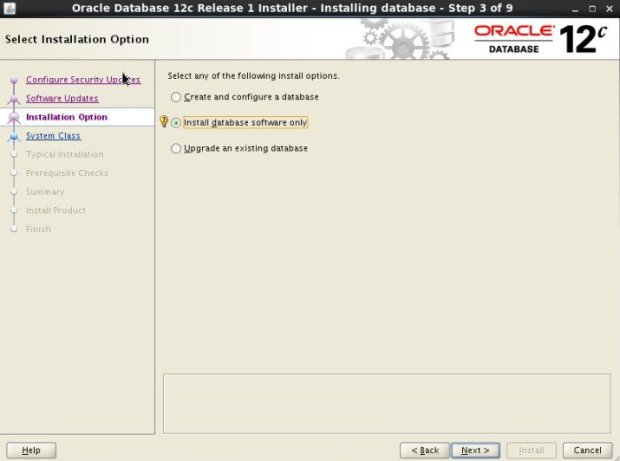
- Select Ïnstall database software only.
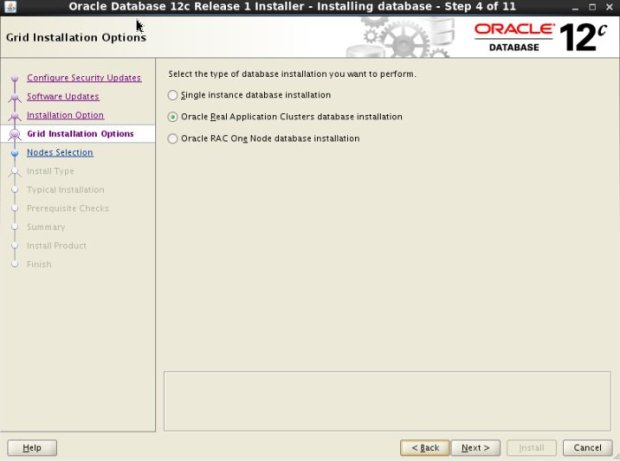
- Choose “Oracle Real Application Clusters database installation” and Click Next.
- Tick both the nodes in the checkboxes on next screen and Click Next.

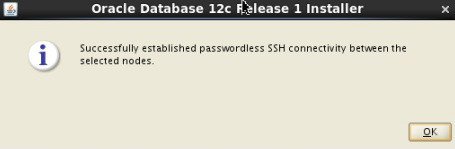
- OUI would check the passwordless connectivity between both these nodes.
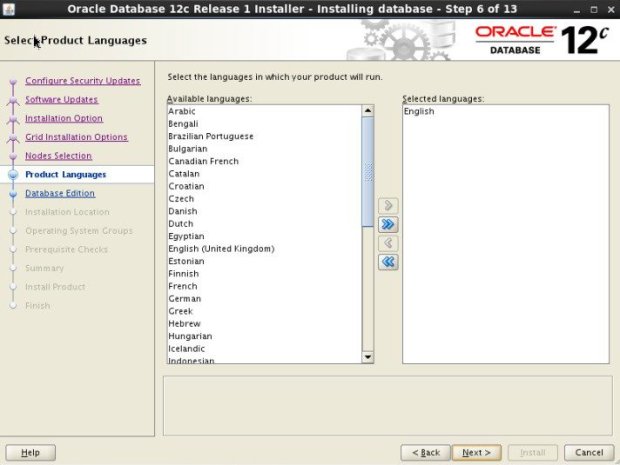
- Choose Language and Click Next.
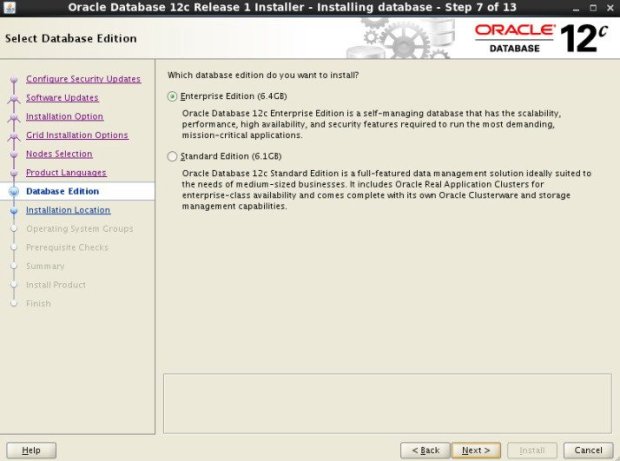
- Choose Enterprise Edition and Click Next.
- Verify the Software location and click Next.

- Choose the appropriate OS group and Click Next.

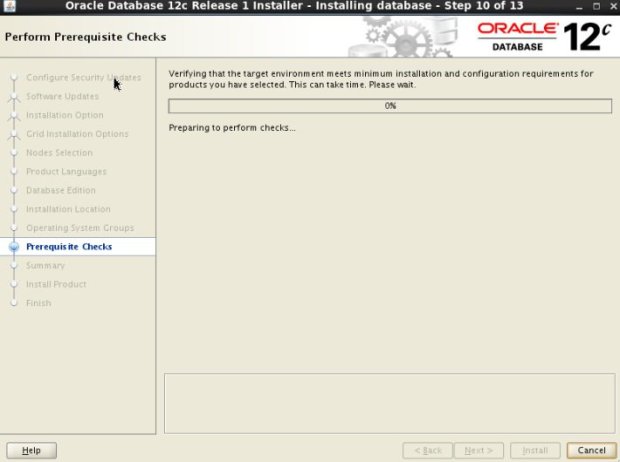
- OUI would now initiate the pre-requisite checks.
- In case of any problem either FIX the error or Ignore and click Next.
- Verify the information on the summary page and click Next.

- This would start the installation.
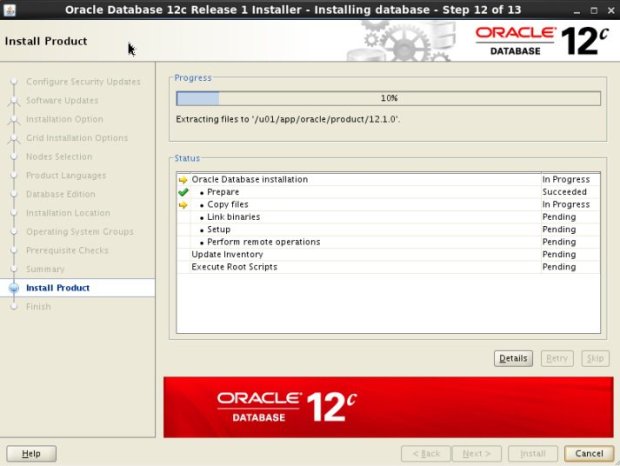
- When prompted execute the script with root user on both nodes and Click OK.

- Once the installation is completed, click Close.

STEP 13 – Creating a Database (via dbca)
- Run the Database Configuration Assistant to create the database.
dbca
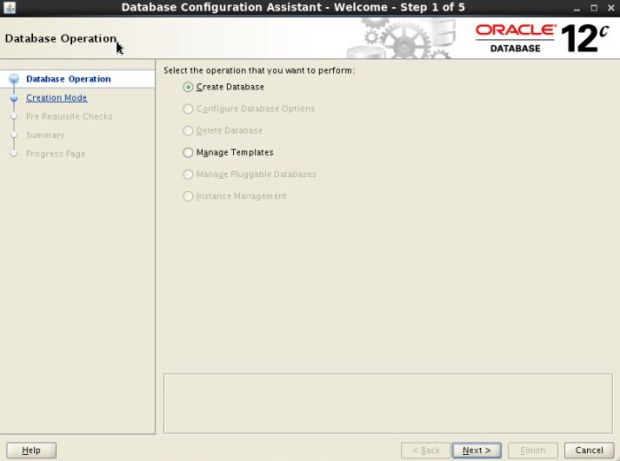
- Once dbca is executed, it would open the welcome screen.
- Choose Create Database and Click Next.
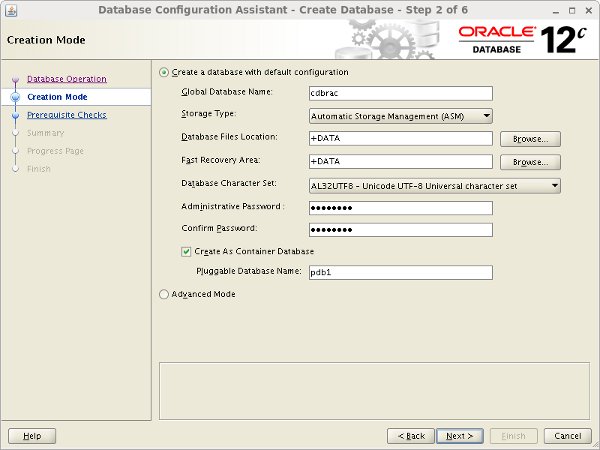
- Specify the Global Database Name.
- Specify Database File Location, this would be our ASM disk.
- Specify FRA, this would also be ASM disk.
- Specify administrative password.
- If you need to create this DB with CDB multitenant architecture, Tick on the “Create as Contained Database and mention the name of PDB to create a Cluster Database with 1 PDB.
- Click Next.
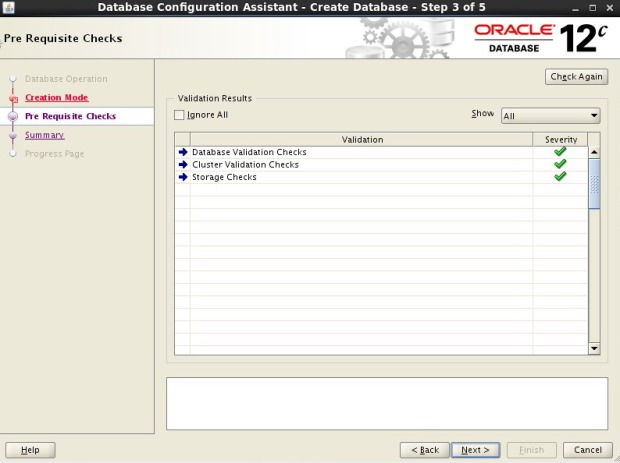
- This would start the pre-requisite checks.
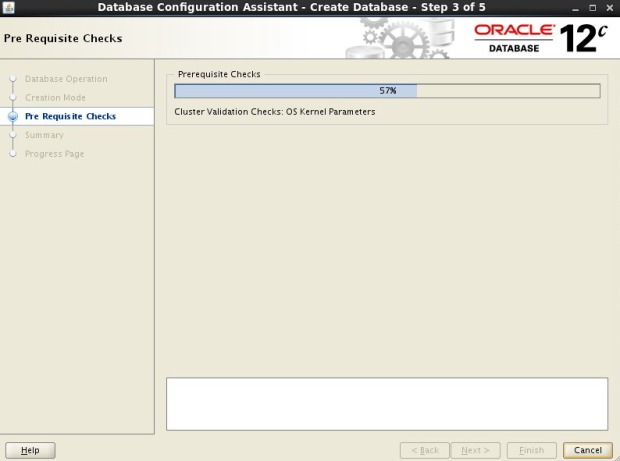
- Check if the pre-requisite validation was completed with Error and accordingly proceed with FIX or IGNORE.
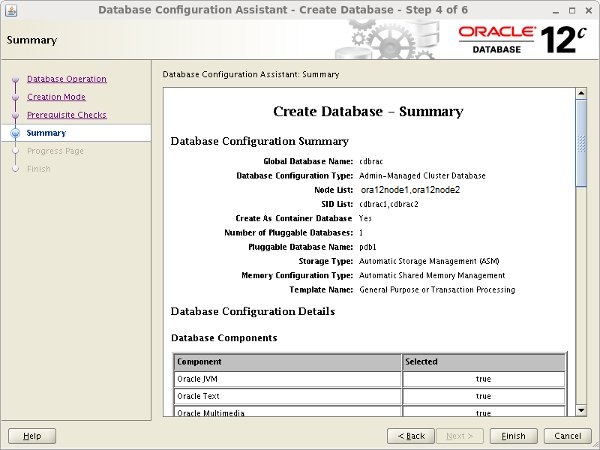
- Now you would be prompted with the summary page of DB creation, verify the parameters and Click Finish.
- This would start the Database Creation process.

- Wait untill the DB creation is completed.

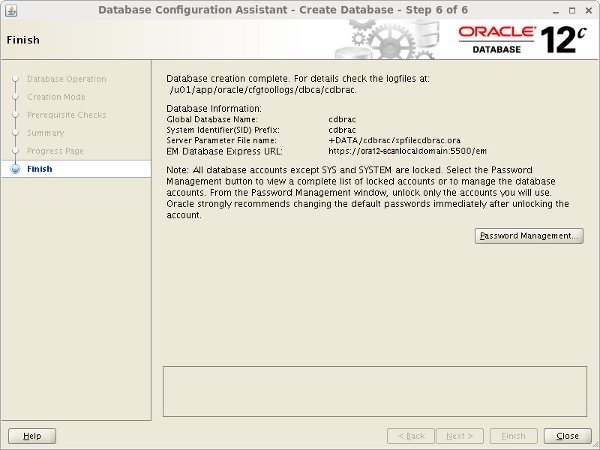
- Once completed you would be prompted with the details of the configuration.
- Click close to exit the database configuration assistant.
And That’s it..!!!!!!
You have successfully created a 2 node RAC database. But any installation and learning is incomplete without errors, so do post your errors in the comments below and one of us would work with you to resolve your issue.
Also since you have built your own cluster its time to go through some fundamentals and internals of Oracle RAC, thus I would suggest to go through the RAC internals and fundamental documents shared in a series of post here.


